*Before teaching the robot, please confirm that the preliminary settings have been completed.
*Please make sure the robot is in teaching mode.
*Please confirm whether the operation level is [1 Advanced level] or above.
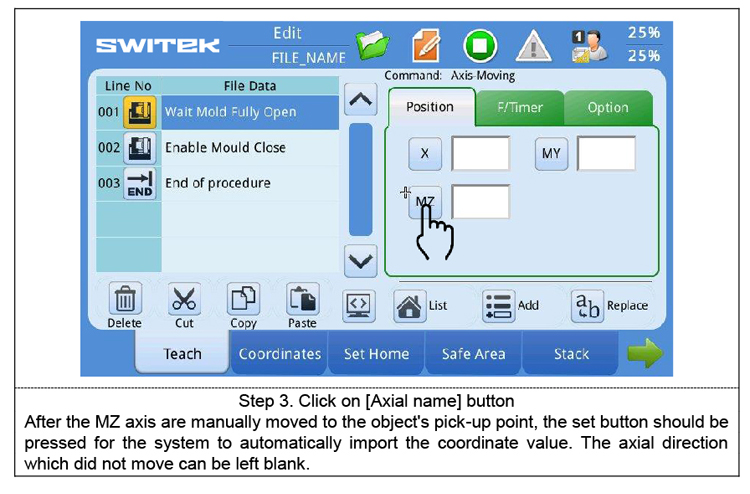
After the MZ axis are manually moved to the object's pick-up point, the set button should be pressed for the system to automatically import the coordinate value. The axial direction which did not move can be left blank.'
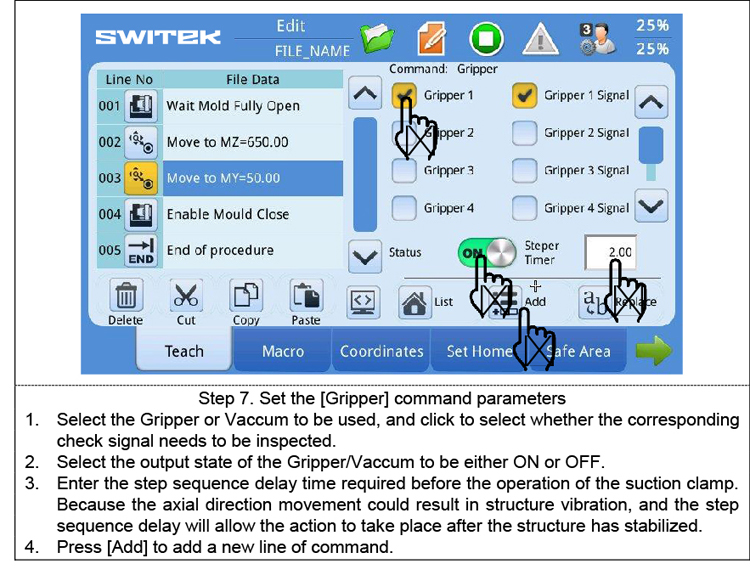
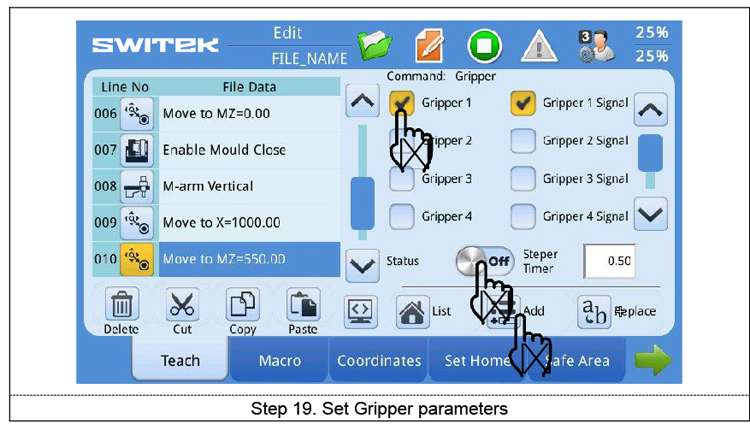
1. Select the Gripper or Vaccum to be used, and click to select whether the corresponding check signal needs to be inspected.
2. Select the output state of the Gripper/Vaccum to be either ON or OFF.
3. Enter the step sequence delay time required before the operation of suction clamp. Because the axial direction movement could result in structure vibration, and the step sequence delay will allow the action to take place after the structure has stabilized.
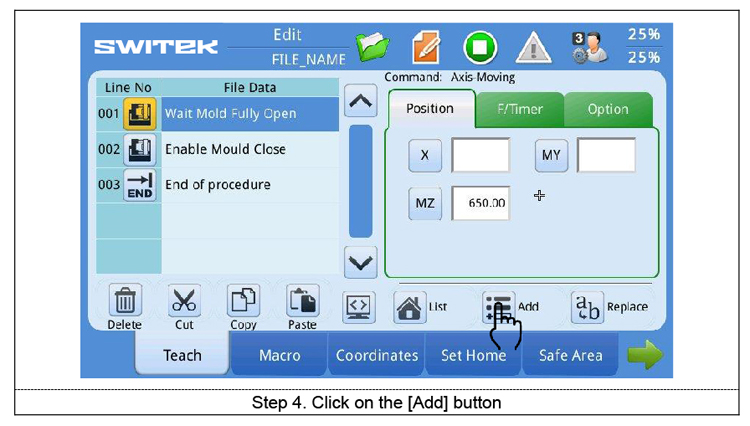
4. Press [Add] to add a new line of command.
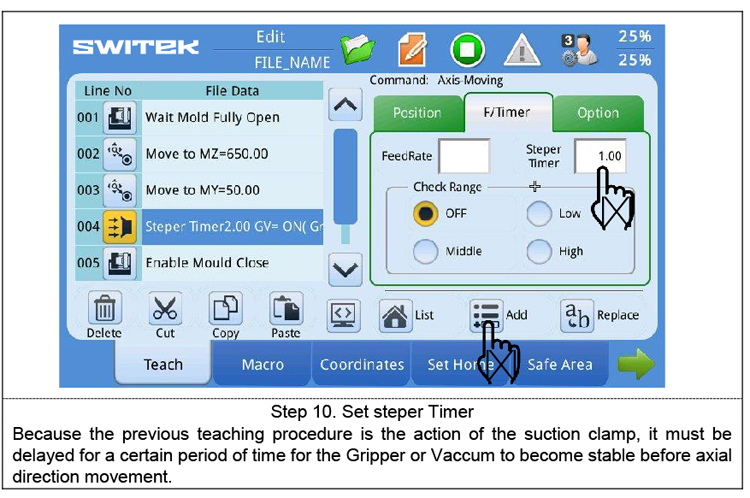
Because the previous teaching procedure is the action of the suction clamp, it must be delayed for a certain period of time for the Gripper or Vaccum to become stable before axial direction movemnet.
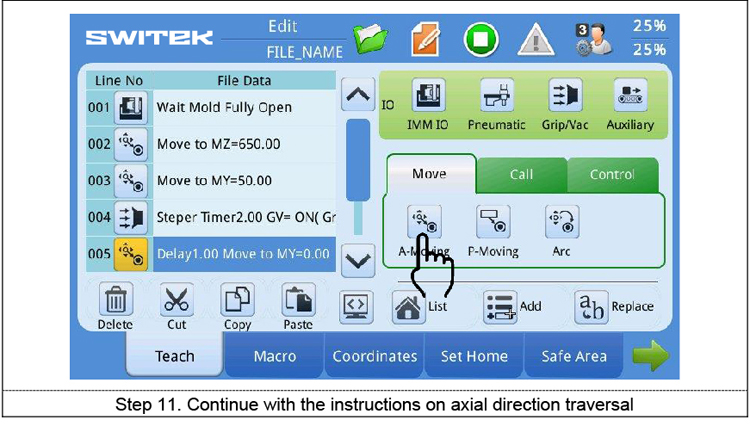
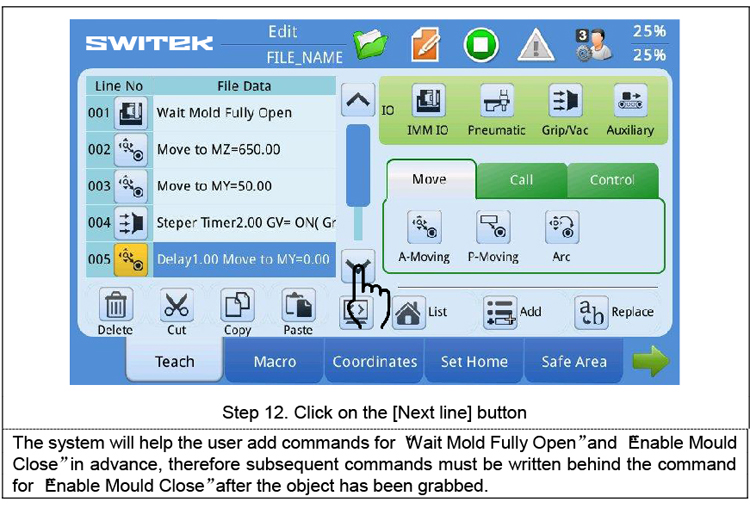
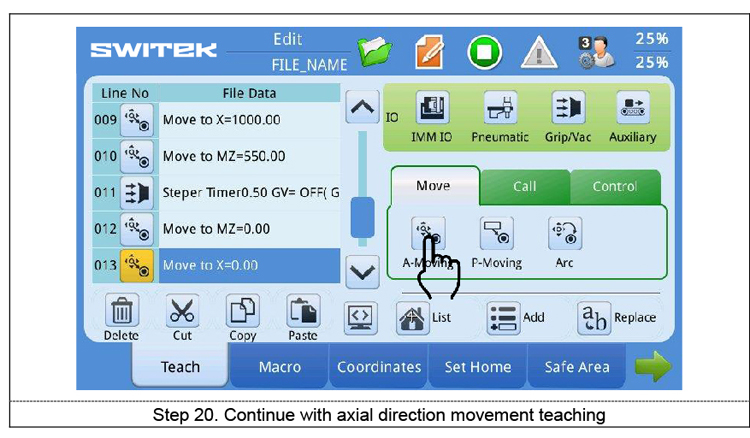
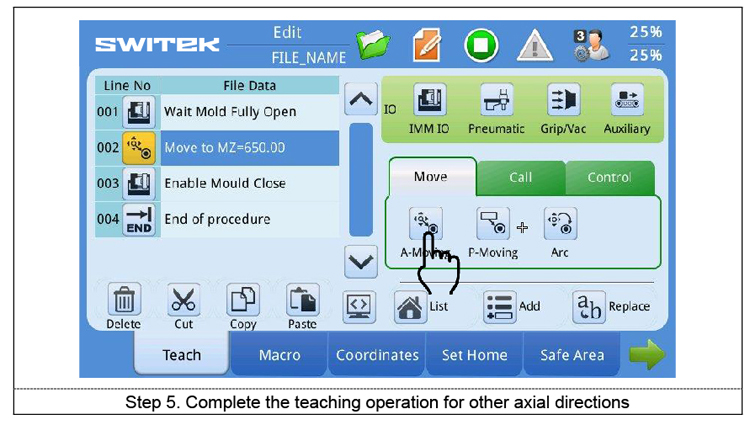
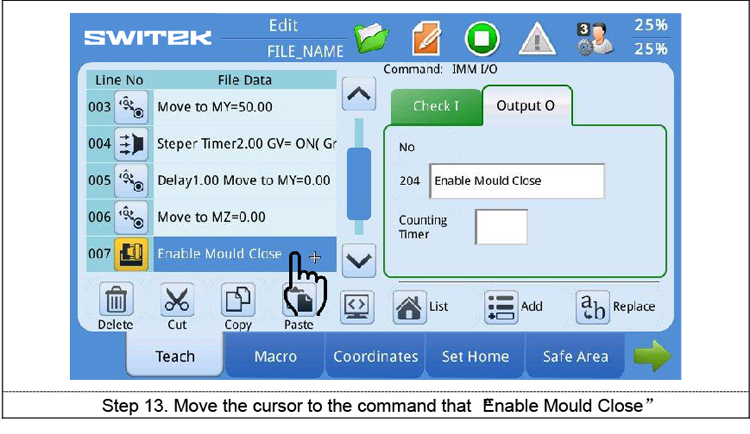
The system will help the user add commands for "Wait Mold Fully Open" and "Enable Mould Close" in advance, therefore subsequent commands must be written behind the command for "Enable Mould Close" after the object has been grabbed.


It is for setting the duration of delay before this line of teaching can be executed. Unit: Seconds.
When signal Check is selected, the system will wait until the main arm's vertical signal to be ON before continuing to execute the teaching program.
When signal UnCheck is selected, the system will continue with the execution of the teaching program when the output of the main arm's vertical valve is ON.